
11 minutes read
Most people think of buildings as a static feature of the environment. They don't realize that buildings move, just like you and I. (Well, kind of like you and I.)
Expansion joints play an underappreciated role in managing structural movement. They’re also an overlooked maintenance item. (This lack of respect is odd, seeing as they’re also called … movement joints.)
Proper use means less chance of leaks, mold development, structural degradation, and premature failure of critical building elements. In other words … it’s important to know how to install expansion joints properly.
Let's focus today on the popular and successful foam-style joint.
[Checklist] Steps to Prep: How to Install Foam Expansion Joints
Using a foam expansion joint and sealant requires knowledge and planning. This checklist will provide a reliable measure to apply to any project, keeping your process consistent and your chances of bond failure at a minimum.
- Get the order right
- Store it wisely
- Get the right tools
- Inspect the full length and width of the joint
- Review the surrounding conditions
- Prepare the joint conditions properly
- Lay the “sticks” of material next to the joint(s)
- Only open what you plan to immediately install
- Install at the correct depth
- Address transitions & terminations
- Check your work, & be patient
◻️Get the order right before you install it.
Construction progress rarely happens in a straight line. Nonetheless, having a clear understanding of the owner’s preferred aesthetic, pricing, and deadline may help prevent circles (or downward spirals).
Typically, the vertical joints in a building are meant for precompressed foam, but sometimes builders opt for lower-cost alternatives. When you do that, however, you can – and will – run into issues with the look and performance.
One example we sometimes see is that the joint is too wide for the lower-priced alternative. Eventually the building owner will recognize that and order you to find a solution that provides an appealing visual (and performs as expected).
If you find yourself in this situation, you’ll soon have to address why the joint’s cost is suddenly $100/linear ft. instead of $35 per lineal ft.
We find it’s easier to justify the cost upfront – simply give the explanation that precompressed foam is easier to install and requires less labor. The reassurance of a better aesthetic upon installation helps as well.
Note that foam movement joints are typically priced by different widths as well. Before you order material, verify the joint dimensions in the field. On projects with varying joint widths, it may be possible to consolidate sizes of material. Consulting with an expansion expert can save you time and money here.
Last, but not least, always order ahead of time. All foam expansion joints are custom-made to order.
◻️Store it wisely – up to the minute.
Precompressed foam has its benefits – but it comes with a need for closer attention to storage and a better plan for use.
Temperature plays a major factor in installation for precompressed foam joints. Cold weather will prevent expansion, and the product won’t fill the joint correctly. In warm weather the product will expand rapidly if you don’t store it properly, preventing installation altogether.
Example: On a 1” joint you want to fill, this product is precompressed to ¾. When you place it in the joint, it’ll expand to four times the amount of the 1” in. joint. So if you don’t do something with it immediately, it’ll expand to 4” while it’s lying on the ground – which is not helpful.
On cold days, make sure your movement joint sealant is off the floor and inside where the temperature is above 68°F. Sealant recovers faster when warm. Meanwhile, on hot days, keep the sealant out of direct sunlight (on days where the temperature is higher than 60°F) until just before you apply it.
◻️Get the right tools.
The time to make sure you have all of your tools ready is before you start applying the sealant. The process is quick, and the right tools make it a lot easier to accomplish. While you may not need every tool for every install, it’s best to have them close to hand just in case.
Tools include:
- Utility knife
- Long serrated bread knife
- Spray bottle with water (to spray bread knife to keep it from getting gummed up)
- Trowels
- Clean bucket
- Jiffy mixer with drill (for joints requiring epoxy)
- Tube and sausage guns
- Duct or masking tape
Note: For overhead work or large joints, it’s helpful to have spare 2x4s and screws to fashion supports. Occasionally, if a stick expands past the opening size of 6’, a 2x4 will help get the whole joint in.
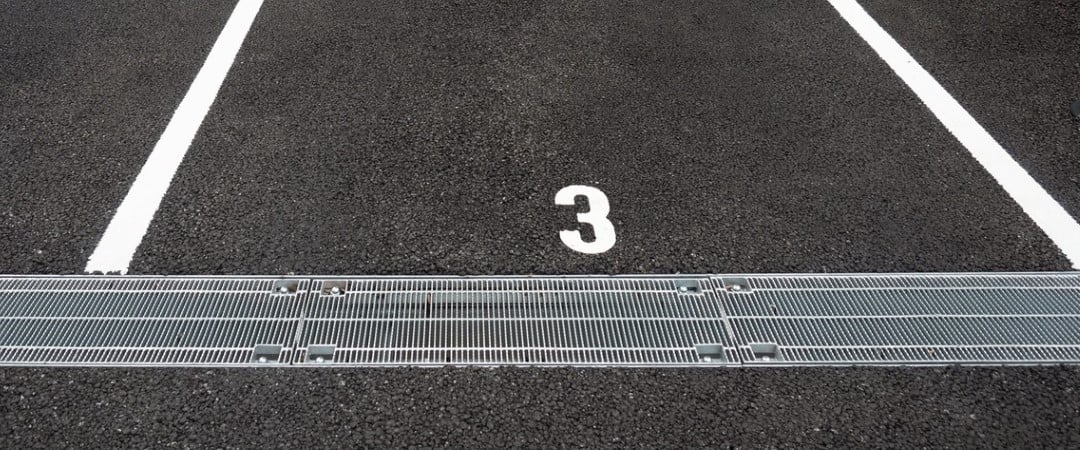
◻️Inspect the full length and width of the joint.
 This step is crucial for identifying any irregularities or damage based on joint fit or function. By starting with a full inspection of the full length and width of the joint, you lay the groundwork for a successful foam expansion joint installation that ensures durability, functionality, and effective waterproofing.
- Carefully measure the length and width of the joint to ensure the foam expansion joint material can be cut to the exact size needed for a snug fit. This reduces the risk of gaps that could compromise the joint's effectiveness.
- Next, look for signs of moisture within the joint area. Moisture can indicate drainage issues or other problems that need to be addressed before installation to prevent failure or water damage.
- Evaluate the condition of the joint edges and surrounding materials. Any deterioration or instability could affect the performance of the expansion joint and may need repair before proceeding.
If the inspection reveals challenges such as irregular joint widths or complex angles, plan for how to address these during installation. This may involve using specialized tools or techniques to ensure a proper fit
◻️Review the surrounding conditions.
Water and temperature are two considerations in any environment where you are applying foam expansion joints. For areas where moisture is a threat, waterproofing is a necessity.
Using sealants in conjunction with foam expansion joints for additional waterproofing means applying them evenly and according to the product instructions. The best approach is to ensure full coverage, avoiding gaps that could allow water penetration.
Extreme temperatures can affect the material's flexibility and the curing process of any sealants. Make sure to install foam expansion joints under suitable temperature conditions. Even in modest heat, prolonged sun exposure can interfere with effective installation.
Likewise, if it’s too cold, the curing time doubles with every 10-degree drop.
As you’re determining how to seal your concrete expansion joints, another part of the system to consider is the cover. A DSM (dual-seal membrane) system, for example, provides a watertight seal across expansion joints in structures like parking garages, bridges, stadiums, and other large-scale construction projects.
The "dual seal" aspect incorporates two layers for enhanced protection against water ingress. This design is particularly important in applications where water leakage could cause significant damage or where high levels of durability and reliability are a must.
◻️Prepare the joint conditions properly.
Cleaning and drying ensure that the foam expansion joint adheres properly and performs as intended. Dirt, debris, or moisture can compromise the adhesion of sealants or the positioning of the foam joint, leading to potential failure and water ingress. The surfaces should be smooth and free of sharp edges that could damage the foam during installation.
Tips for cleaning surfaces:
- For concrete: Remove loose particles and weak concrete to ensure the surface is sound. Identify and repair spalls, chipped edges and uneven surfaces using suitable patching material and proper patching geometry and techniques. Joint faces must be parallel and unobstructed. Remove contaminants by sandblasting or grinding, but avoid using a wire wheel, as that will polish the substrate to the point of bond failure.
- For metal: Sandblast or grind to rough, white metal and solvent. Wipe immediately before applying epoxy.
◻️Lay the ‘sticks’ of material next to the joint(s).
Install the foam expansion joint with the correct level of compression as recommended by the manufacturer. Over-compression or under-compression can affect the joint's ability to accommodate movement and maintain a watertight seal.
During installation, provide pressure between the sticks. The easiest way to achieve this is to:
- Leave the end of the stick previously installed out of the joint
- Install the new stick with that end sticking out
- Push both down.
During repairs, cut the repair section a little long and bow the middle of the segment upward. Once that area is pushed down, the correct amount of pressure will be in effect.
◻️Only open what you plan to immediately install.
Once material expands beyond the joint width, it can be impossible to get into the joint.
Remember: Many foam expansion joint materials are compressed for packaging to save space and facilitate easier handling and shipping. Cutting the material to the required length while it's still in its compressed state and packaging ensures that it doesn't expand or stretch prematurely, which could make it more difficult to handle and install accurately.
Cutting to the correct length while it remains in the package helps maintain the integrity of the foam joint until it's ready to be installed, reducing the risk of deformation. The packaging helps to keep the material straight and manageable. This can lead to more precise cuts and efficient use of material. By cutting to the exact needed length beforehand, workers can then quickly move from one installation point to another without the need to adjust material length on the spot.
Keeping the expansion joint material in its packaging also protects it from:
- Moisture
- Dirt
- Physical damage
◻️Install at the correct depth.
Installing the foam joint at the correct depth is essential for its effectiveness in accommodating expansion and contraction. The depth of an expansion joint is typically determined by the type of joint system you’re installing and the specific application.
For example, in a building facade, the depth of the joint needs to accommodate not just potential movement, but also any materials or sealants used within the joint. Manufacturers often provide specifications for the optimal depth based on the joint system's design and the expected movement.
Due to the complexity of predicting structural movement and the potential consequences of incorrect depth, get professional guidance when you’re not 100% sure. A distributor with technical expertise can explain how each product type and job site influences ideal installation depth.
◻️Address transitions and terminations.
It’s safe to assume that there will be at least one change in direction as you install sealant into joints on your construction project. In the event this occurs, knowing the plan well before you start installing is the best way to achieve success.
For all 90° changes, each piece should be cut at a 45° angle and then joined. Another option is to notch the foam out and bend the stick at the change in plane.
◻️Apply adhesives wisely.
When you correctly deploy a foam expansion joint, it’ll provide a snug fit and support its weight in the joint. However, depending on the type, an adhesive might be necessary.
If this is the case, a caulking gun and silicone are your answer.
- Before the epoxy cures, force the tip of the nozzle between the substrate and the foam.
- Inject a band between the foam, cured silicone facing, and the joint face. A typical band will be ¾” deep.
- Blend the silicone firmly with the substrates and cured bellows, ensuring a proper bond and seamless appearance.
- Remove the excess silicone that squeezes out from the top.
Pro Tip: Silicone left between the wrinkles of the bellows could constrain movement -- be sure to remove excess sealant and blend what remains into the bellows.
◻️Inspect your work, & be patient.
If you now know how to install concrete expansion joints, this should be the easiest step!
Before you call the job complete, go back over what you just installed and inspect carefully (particularly where new sticks begin). Having the property owner angry or disappointed with the job – either that day or in 6 months – isn’t worth cutting corners.
It’s also not ideal to have to revisit the site and redo some of the work because you didn’t check it when it was complete. Some issues can be resolved quickly if they’re found immediately and not left to amplify over time.
Don't reopen anything before the product is ready. Allow the sealant to skin over before you expose it to traffic (where applicable).
Installing Foam Expansion Joints Doesn’t Have to Be Hard
Once you become comfortable with the above checklist, the recurring red flags will be apparent very quickly at each new job. You’ll know where you need more time or to plan for angle changes, you’ll know whether you need adhesive, and you’ll have far less chance of angering the property owner.
Questions on Installing Foam Expansion Joints?
Knowing how to install a foam expansion joint – and when it’s the best option – is half the battle. However, if you have more questions related to joints and sealant installation, we have additional expert resources available:
